Please pray for my dear friend, Grace!!


Blogroll

Splitcoast Dirty Dozen

Splitcoast stampers Alumni

Design Teams
ODBD Bread Basket

ODBD Design Team
-
A Card for Dad2 weeks ago
-
-


My past dt sisters at ODBD
-
-
Coloring fun1 year ago
-
Wonderful Christmas Ornaments2 years ago
-
-
Natural Beauties ~ Power Poppy7 years ago
-
Feel Better Soon9 years ago
-
ODBDSLC268 Anything Goes10 years ago
Sunday, July 31, 2011

Happy Saturday Everyone!! I hope you are all enjoying the weekend!! It is hot and humid here!! Today we plan to stay indoors and take wall hangings down, patch the nail holes and paint til we drop. LOL! I hope we get a lot accomplished before I leave to go to my parents this week. I have until Tuesday...since we don't work on Sunday and go to church etc., that leaves today and Monday. My hubby will be home but with work and all, he will be so busy. Next week we have a Realtor Open House...
Anywho....today it is time for another Shining the Light challenge at Our Daily Bread Designs!!
This weeks challenge:
Create a card or project using the sketch with a twist. The twist is you can use any center panel shape you would like in the center.

To make the challenge even more fun, we will be giving out a prize , a $15 gift certificate to be used toward stamps at the Our Daily Bread Designs store !! Entries for the prize must be submitted by Thursday, August 5 at 8 a.m. One random winner will be chosen and announced next Saturday. If you are not using ODBD stamps, please do not enter more than once. Additional entries without using ODBD stamps will not be commented on or will they qualify for prizes .
While it is not required to use Our Daily Bread Designs images and sentiments on your creations, we would love to see them if you have them.As a way of recognizing those who do use Our Daily Bread Designs stamps, we will again be choosing 1 to 2 creations to spotlight for our Shining the Light Award. In order to qualify for this award, however, you must use Our Daily Bread stamps and have your submission added to Mr. Linky by August 5 at 8 a.m. EST.If you upload your creations to Splitcoast Stampers or any other online gallery , please use the keyword is ODBDSLC70. When creating your posts on blogs please include a link to the challenge.
For more inspiration for this challenge, please visit my dt sisters:
To join the challenge, please link your creation here.
Challenges I am entering my creation in:
Simon Says Stamp and Show... - Anything goesKaboodle Doodles - Stitching - Faux or realCrazy Challenge - RibbonsAmber's Crafts and Stuff - #20 patterned paperStampin' B's - JFF - use ribbon Inspire Me Fridays - always anything goes, Patties Creations - must include a stamped image - faux or real stitching, Phindy’s Place - diecuts, Sew Many Cards anything goes, Totally Papercrafts - bling, 4 Crafty Chicks - bling, Craft Us Crazy - anything goes, Paper Shelter Challenge - #24 anything goes
Thanks for stopping by!! Have a great day!! Your comments are deeply appreciated!! I hope you are able to join the challenge this week!!
hugs,

Thursday, July 28, 2011

Anywho today I have lots to share and catch up on....
First it is my turn to share a de-stressed or distressed creation with you at Sunday's With Crissy!! Such a fun challenge!! For my card I used the darling Fairy Daydreams image (available at Whimsy stamps) illustrated by Crissy. I colored it with copics. For my distressing I used ink on my sentiment panel and a distressing tool to rough up on the edges on the rest of the card. The sentiment is from Whismy's sentiment collection and is called Summer Letter Seals. The flowers are from Wild Orchid and prima. I also added my homemade croceted flowers. The dp is Basic Grey but I am unsure from which pad....sorry!!

You have a few more days to join in on the DT call over at Sunday's With Crissy. If you love her images, here is your chance..... and....... To enter your De-stressed creation Click HERE!!!
There will be five free digi's given to one lucky challenge participant who will be chosen by Random.org at the end of the month! You may now use images from any company and still be included in the draw for the blog candy prize ! Those who use one of Crissy's images, either from her rubber or digital collections will be entered twice in the draw. But please respect the rule of no more than three entries per month.
challenges I am entering my creation in:
Amber's Crafts and Stuff - #20 patterned paper
Crafts and Me- Ribbon
Divas by design- Summer
House that Stamps Built- Glitter
Little Darlings Challenges- Girly
Paper Shelter Challenges- Anything Goes
Ruby's Rainbow- Vintage
Stampavie and More- summer
Anything Goes Challenge- Flowers
Deep Ocean Challenge- Ribbons
Everybody Art Challenge- Garden
Top Tip Tuesday- Make it Girly
Bunny Zoes- Fairies
Crafty Cardmakers- Sentimental
Cupcake Craft- Shabby Sparkle
Karen's Doodles- Bingo- Gems, Die cuts, flowers
Ooh La La- Circles
Stampin Scrapping Central- Bling
There's Magic in the Air- Layer (atleast 6)
Victorine Originals- bling
Come and Get it- Make your own flowers
Sparkles forum- elegant and lace
My next creation is a sneak peek of the new images which will be available at Our Daily Bread Designs!!! I just love this upcoming release and I think you will too!! I actually made time to play in yesterday's sketch a Splitcoast since I gave up up on my computer.

For my card I used some old K and Co. paper from my scrap stash and the new sneak peek images and sentiment: Spool & Tape, Pincushion, and Sew Special to be release on August 1 at Our Daily Bread Designs!! I did not use them for this card, but there are also dies available to cut out the spool and tape and the pincushion.
Challenges I am entering this card in:
Papercraft Star Challenges- Anything goes
Truly Scrumptious- Buttons and Bows
Clear it Out- anything goes with old supplies (old dp from stash)
Karen's Doodles Netherlands- Anything goes
Crazy Challenge- Ribbons
Kaboodles Doodles- Stitching
Make in Monday- Anything Goes
Simon Says Stamp and Show- Anything Goes
Squigglefly- use kraft paper
Squigglefly- use kraft paper
Lollipop Crafts- Anything goes
2 sisters- Anything goes
Next did you hear!........

YEAH! Whimsy Stamps will be starting a new challenge blog on Wednesday, August 10th. I know a lot of you play in challenges where you can win Whimsy Stamps and now you have the chance to actually play in Whimsy challenges for the opportunity to be a Guest Designer and win fabulous stamps. Now head on over to the challenge blog to see what's new and how you can win this.

Last....Did you know that Stamp and Create is going to carry Magnolia Stamps!!! Woo hoo!!Another opportunity to purchase Magnolia stamps in the USA!!
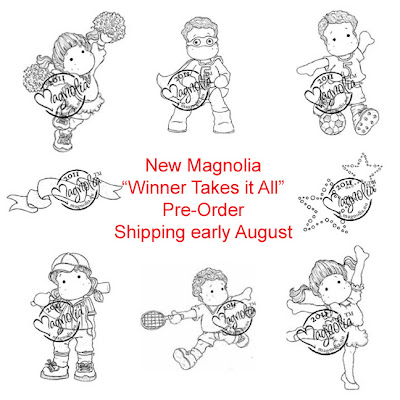


The new Magnolia "Winner Takes it All" Collection is now available for Pre-Order...

Shipping the beginning of August.
To celebrate that Lacey is now carrying Magnolia Stamps, Lacey is offering some candy!!!

To enter :
~ Help spread the word by grabbing the image above and post it in your sidebar on your blog
~ Link the banner to http://www.blogger.com/goog_1882604335m
~ Then enter in the linky here.
The prize:
3 Free Magnolia Stamps (of your choice) from the new Winner Takes it All Collection!
The winner will be drawn on Wednesday, August 10th.
I am sorry about the lengthy post!!! ....Just so much to share today! Have a great day!! I pray that my computer and blogger cooperates today so I can be inspired by you!!
Thanks for stopping by!

Tuesday, July 26, 2011
Hi all!! I hope you are all doing well!! Life has been busy and very HOT here. Blogger has been giving me a very hard time. It takes forever to leave a comment since when I go to publish it, it keeps coming up as SERVICE UNAVAILABLE. GRRR!!
Anywho...on to my post...which took me forever to get to post....
I so love to make homemade gifts for friends and family. There is no better way of showing someone you care than to take to make something from the heart.
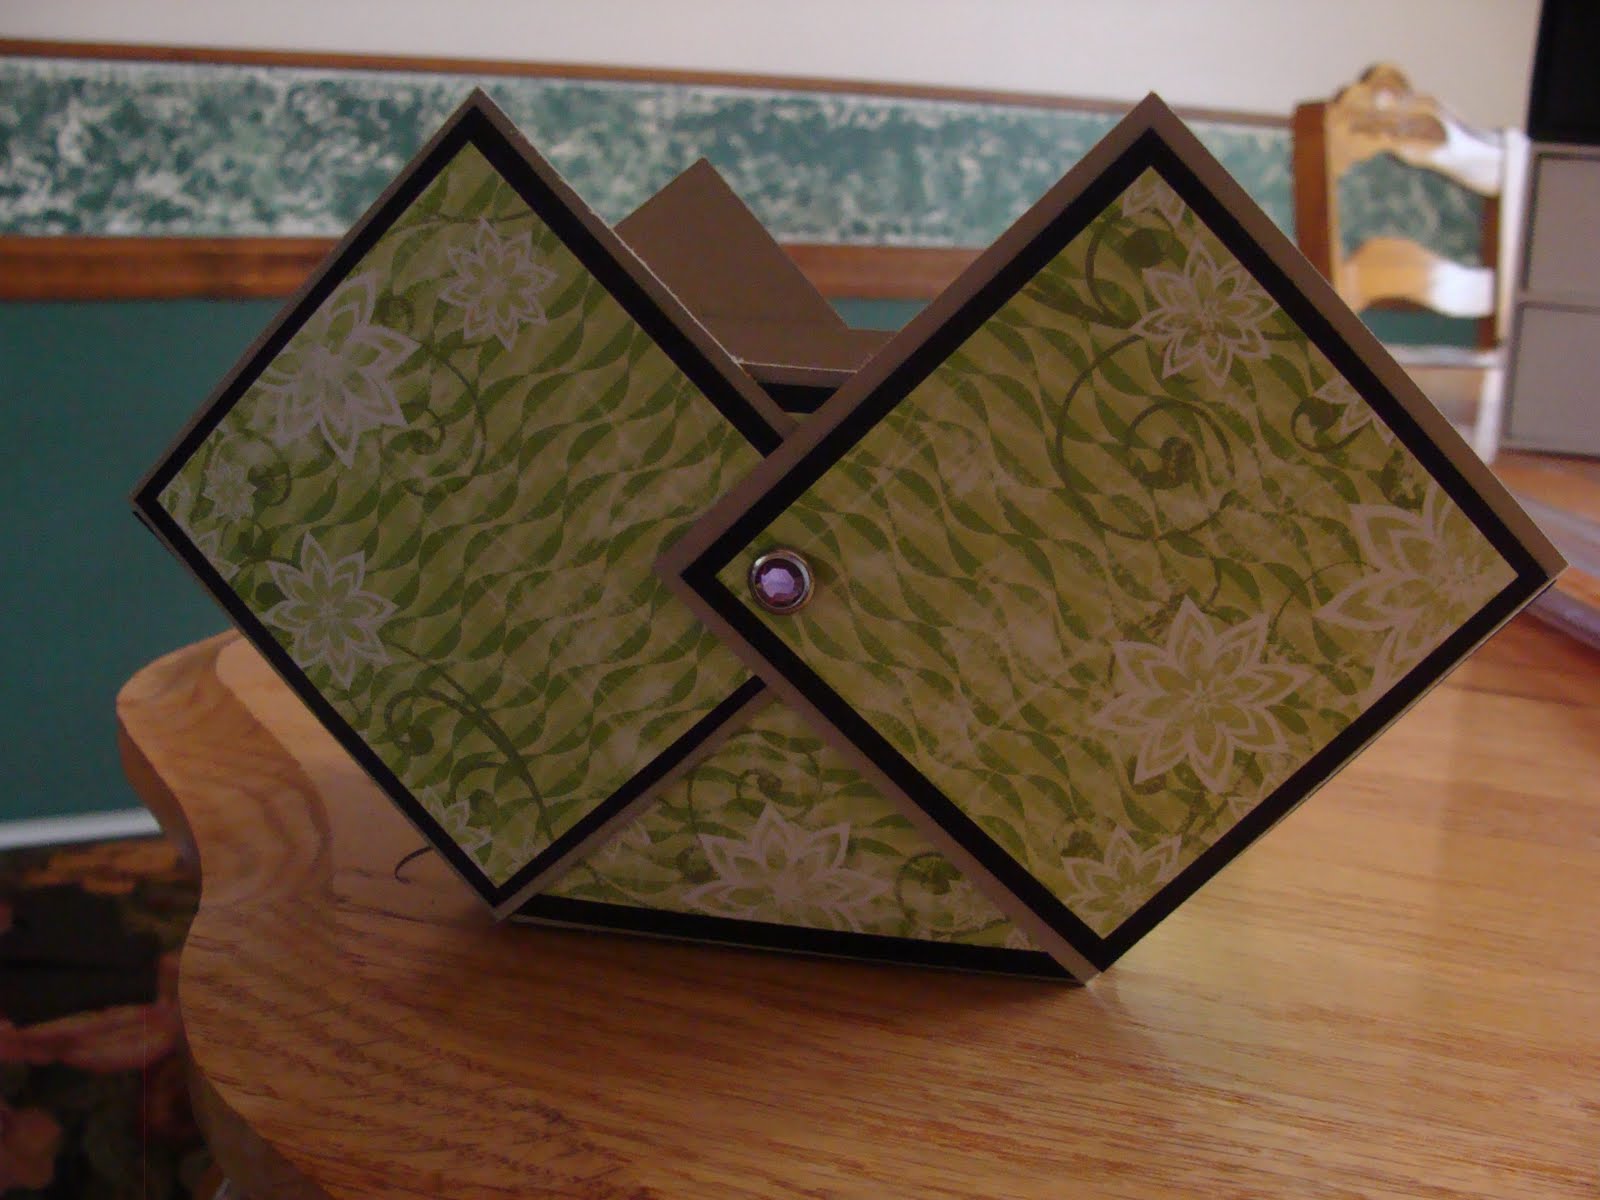
Today I would like to share a tutorial on how to make a “diaper fold gift basket”. The base of my basket is 3 by 3 inches.

You will need:
- a cutter
- a scoring tool
- a 12 by 12 inch piece of heavy cardstock
- designer paper
- 2 brads
- An edger punch
- adhesive
- embellishments and stamps of choice
- stamps I used: Our Daily Bread Designs: Hydrangea (Garden Collection), Serve the Lord and Crocheted Circle die.
Step 1:
Cut a 9 by 9 inch square out of the card stock. Save the remaining scrap for the handle.
Step 2: Score the card stock at 3 inches 6 and inches all the way down both horizontally and vertically.
Step 3: Cut the line at the 3 inch and 6 inch score line to the perpendicular score line on each side.
Your card stock should look like this:

Step 4: Cut and paste 8 – 2 ¾ inch square pieces of designer paper to adhere to all the outside squares. The middle square is the bottom and does not need a piece of designer paper.

Step 5: Bring up two of the cut squares crossing the middle square making it look like a diaper. Pierce a hole in the middle and insert brad but do not bend brad yet. Do the same for the opposite side.

Step 6: Put the basket aside and begin handle. Cut a 3 by 12 inch strip of cardstock (from remaining scrap.

Step 7: Punch both edges lengthwise to make a decorative edge. Embellish as desired. Pierce a hole 1/2 inch from each end of the handle.

Step 8: Remove brad on one side of the basket and slip completed handle between 2 folded in squares and the center square (like a sandwich). Line up pierced holes.

You should not see the handle on the inside of the basket.
Insert brad and bend back ends to secure in place.

Step 9: Repeat for the other side.
Decorate as desired. Here is my finished basket.
Thanks for stopping by! I hope you enjoyed my tutorial!!
blessings,
Chris
Sunday, July 24, 2011
Happy Sunday Everyone!! I sure hope wherever you are is not as hot as here. It has been over 100 degrees and 100% humidity. Boy you can cut the air with a knife. Brutal!! This is when I am so thankful for my air conditioning!!! Unfortunately we are at my mom and dads for the weekend and they have no air. UGH!!!
Anywho....enough venting....Yes I am just a spoiled New Yorker....
Well...today it is time for another Stampin Sisters in Christ challenge. This is the last challenge I may be participating in for a while. My family and are going through some life changes and crafting needs to be cut to a minimum. I will post from time to time but less frequently since I am on hiatus from most of my teams.
This week's challenge host is my amazing, sweet, beautiful..... and exceptionally talented friend, Grace!!!
Grace chose the verse:
Isaiah 55:8-9 For my thoughts are not your thoughts, nor are your ways my ways, declares the Lord. For as the heavens are higher than the earth, so are my ways higher than your ways and my thoughts than your thoughts.
This verse really hits home for me as we are trying to sell our home and we feel God is calling us to Virginia 500 miles away!! Anyone who attempts to sell their house particularly in a very BAD economy knows it is frustrating to say the least. At one point we thought we had it sold but it fell through....As a human, you say...Why Lord?!! but He knows the plans He has for you...plans to prosper you and not to harm you...Plans to give you hope and a future. Recently the house I had my heart set on in the location we plan to move to....sold to another buyer....the third house I liked and it is gone....but as one of my dear friends said....God has better plans for you. I was devestated and upset but she is right...I can't rush God....He has the perfect timing!!! He is good and when trials and problems of life come our way, we must remember He is in control. I needed this verse and I thank God for friends like Grace, who are there to remind me of God's promises and love!!!
Grace's challenge is:
Create a card or project that depicts the sharp contrast of black & white or ivory. There should not be any other colors on your creation!!
My take on the challenge:
 For my creation I used the Serve the Lord stamp set from Our Daily Bread Designs. I colored in the floral image with black to make a silhouette. The circle was cut out with the Crocheted Circle die. The lace is from my dear friend Sabrina (Thanks Sabrina!!!). The corners are cut with a cuttlebug vintage corner die. The middle border is also stamped using the Serve the Lord set and cut out with a Crocheted border die at ODBD.
For more inspiration for the Stampin in Christ Challenge, please visit my dt sisters:
Grace, Linda, Lisa, Peggysue, Randi (on leave), Miesje, Kristine, Sabrina, Marilynn and Becky.
This week's sponsor is Layers of color who generously donated the newly released Encouragement Art stamp set as a prize. Thank you!!!
For the full devotional and challenge details please visit the Stampin Sisters in Christ Challenge.
Thanks for stopping by and for your comments!!
Have a great day!!
blessings,

Anywho....enough venting....Yes I am just a spoiled New Yorker....
Well...today it is time for another Stampin Sisters in Christ challenge. This is the last challenge I may be participating in for a while. My family and are going through some life changes and crafting needs to be cut to a minimum. I will post from time to time but less frequently since I am on hiatus from most of my teams.
This week's challenge host is my amazing, sweet, beautiful..... and exceptionally talented friend, Grace!!!
Grace chose the verse:
Isaiah 55:8-9 For my thoughts are not your thoughts, nor are your ways my ways, declares the Lord. For as the heavens are higher than the earth, so are my ways higher than your ways and my thoughts than your thoughts.
This verse really hits home for me as we are trying to sell our home and we feel God is calling us to Virginia 500 miles away!! Anyone who attempts to sell their house particularly in a very BAD economy knows it is frustrating to say the least. At one point we thought we had it sold but it fell through....As a human, you say...Why Lord?!! but He knows the plans He has for you...plans to prosper you and not to harm you...Plans to give you hope and a future. Recently the house I had my heart set on in the location we plan to move to....sold to another buyer....the third house I liked and it is gone....but as one of my dear friends said....God has better plans for you. I was devestated and upset but she is right...I can't rush God....He has the perfect timing!!! He is good and when trials and problems of life come our way, we must remember He is in control. I needed this verse and I thank God for friends like Grace, who are there to remind me of God's promises and love!!!
Grace's challenge is:
Create a card or project that depicts the sharp contrast of black & white or ivory. There should not be any other colors on your creation!!
My take on the challenge:
For more inspiration for the Stampin in Christ Challenge, please visit my dt sisters:
Grace, Linda, Lisa, Peggysue, Randi (on leave), Miesje, Kristine, Sabrina, Marilynn and Becky.
This week's sponsor is Layers of color who generously donated the newly released Encouragement Art stamp set as a prize. Thank you!!!
For the full devotional and challenge details please visit the Stampin Sisters in Christ Challenge.
Thanks for stopping by and for your comments!!
Have a great day!!
blessings,

Saturday, July 23, 2011
Happy Saturday Everyone!! I hope you are all having a great and restful weekend!!
Today it is time for another Shining the Light challenge at Our Daily Bread Designs!!
This weeks challenge:
Use piercing on your creation.
To make the challenge even more fun, we will be giving out a prize, a $15gift certificate to be used toward stamps at the Our Daily Bread Designs store!! Entries for the prize must be submitted by Thursday, July 28. One random winner will be chosen and announced next Saturday. If you are not using ODBD stamps, please do not enter more than once. Additional entries without using ODBD stamps will not be commented on or will they qualify for prizes.

To join the challenge, please link your creation here.
Thanks for stopping by!! Have a great day!! Your comments are deeply appreciated!! I hope you are able to join the challenge this week!!
hugs,

Today it is time for another Shining the Light challenge at Our Daily Bread Designs!!
This weeks challenge:
Use piercing on your creation.
To make the challenge even more fun, we will be giving out a prize, a $15
While it is not required to use Our Daily Bread Designs images and sentiments on your creations, we would love to see them if you have them.As a way of recognizing those who do use Our Daily Bread Designs stamps, we will again be choosing 1 to 2 creations to spotlight for our Shining the Light Award. In order to qualify for this award, however, you must use Our Daily Bread stamps and have your submission added to Mr. Linky by July 28 at 8 p.m. EST.If you upload your creations to Splitcoast Stampers or any other online gallery , please use the keyword is ODBDSLC69. When creating your posts on blogs please include a link to the challenge.
Now on to my take for the challenge:

I made this card for a friend who is struggling with cancer. I wanted to make the card summery and bright so I used the beautiful digital paper from Bearly Mine Designs. I added piercing around the sentiment to meet the challenge and to make a more elegant frame.
Card Recipe
ODBD stamps: Not Forgotten
Paper: Bearly Mine Digital Delicious Delights
Flowers: Wild Orchid, Whimsy Yellow Cherry Blossoms, White Prima flowers
May Arts white Ribbon and bow easy
For more inspiration for this challenge, please visit my dt sisters:
To join the challenge, please link your creation here.
Thanks for stopping by!! Have a great day!! Your comments are deeply appreciated!! I hope you are able to join the challenge this week!!
hugs,
Thursday, July 21, 2011

Lattice Basket tutorial (3 ½ inch Base)
materials:
2 -12x12 inch pieces of card stock
lattice punch or punch of your choice
2 brads
adhesive- I used scoretap
cutter
scissors
optional: Small Sweet William from Our Daily Bread Designs and Spellbinders Blossom 3(to make the flower)
ODBD Serve the Lord (for tag sentiment)
Step 1 Cut a 5 ½ by 5 ½ inch square.
Step 2 Score a line on all sides 1 inch from the edge.
Step 3 Cut on short scored lines to 1 inch score line on corners to create tabs. (See photo)

Step 4 Adhere corners on outside of box with adhesive to make a base for the basket.


Step 5 Cut 6 1x8 inch strips. Score a line two inches from each edge on all strips. (See photo) I embossed 4 of the strips since they are going to be the base edge and top decorative edge.


Step 6 Using Large Martha Stewart Lattice punch. Cut 4 strips that are 3 ½ inches tall. Adhere to the corners in front and back of base (sticking straight up like in the photo).


Step 7 Create a 3 ½ inch square template to guide you on where to make the top rim of basket. Adhere unembossed strips together. The strips will overlap by 1 inch giving you room to adhere them together. Make sure punched strip is in front of the stripped rim. It will be covered with a decorative rim later.


Step 8 Adhere decorative embossed strips on the front and back or the basket leaving the sides open so you can insert the handle.
Step 9 Cut 1 ¾ x 12 inch strip for a handle. Punch a decorative edge on each long side (see photo). Decorate handle as desired.

Step 10 Adhere handle to the center of each side of the basket. Glue down side decorative rims over top of the handles. Secure with brads.


Step 11 Adhere remaining 2 decorative embossed strips to the base rim of the box.

Your finished box….decorate as desired. I created a flower with the Small Sweet William flower from Our Daily Bread Designs on some Tissue Metallic material.
Here is a close up of the Sweet William flower that was heat embossed using Sweet William and red metallic tissue material. There is a die from Spellbinders called Blossoms 3 which matches this Sweet William that cuts out this flower. You then singe the ends of the fabric on a candle to the embossed outline to keep the material from fraying.

I hope you enjoyed my tutorial!! If you like tutorials or making

Thanks for stopping by and for your comments!!
Have a great day!!
blessings,
Wednesday, July 20, 2011


Hello and welcome to the Whimsy Stamps July rubber release BLOG HOP! If you are here for the Whiff of Joy Challenge, please scroll down to the next post as this is my second post of the day.
The Whimsy July rubber release happened last week on July 13th, but today we are hosting our blog hop to showcase the 9 fabulous new rubber stamps and 2 new Shapeology metal dies now available at Whimsy Stamps! These new goodies are available to buy from the Whimsy Stamps store along with all your Whimsy favorites. We also have our wonderful special guests joining us for this hop - Deb Routledge, Elaine Hughes, Niki Estes and Zoe McGrath.
The Whimsy Stamps DT have been showcasing these fabulous stamps for the past 6 days, so if you missed them be sure to hop on over to the Whimsy Inspirations Blog for some more inspiration!
Here is a full list of the wonderful July release rubber stamps and dies:
5 stamps from Kenny K
Boogie Down ~ Holla Back Girl ~ Hot Weave ~ Spy Chick ~ Victory Kid
4 stamps/sets from Raindrop Echo Designs
A Touch of Elegance ~ Adventure Mini Postage Stamps ~ Vintage Bottle Labels ~ Vintage Transportation
2 dies/sets from Raindrop Echo Designs
Dress Form Die (coordinates with ‘A Touch of Elegance’ stamp set) ~ Elegant Flourishes
If you would like to hop along with us today, please CLICK HERE to return to the beginning of the hop at Lori’s blog. The hop starts today (Wednesday July 20th at noon EST) and ends on Wednesday July 27th at noon EST.
For this hop we have 6 different prize draws! We have one grand prize draw where one lucky hopper will win a selection of new release stamps for hopping along with us. We also have 5 mini candy stops throughout the hop where you can enter to win a new release stamp!
Today I have a super fun card to share with you using the Kenny K image, Spy Chick and Raindrop Echo Designs Adventure Mini Stamps. The sentiment stamps are cut out with the mini postage die.
Today I have a super fun card to share with you using the Kenny K image, Spy Chick and Raindrop Echo Designs Adventure Mini Stamps. The sentiment stamps are cut out with the mini postage die.

Card Recipe:
stamps: Whimsy rubber Kenny K image, Spy Chick and Raindrop Echo Designs Adventure Mini Stamps. papers: from my scrap bin
My second creation uses A Touch of Elegance and Dress Form Die.

stamps: Whimsy A Touch of Elegance
Paper: Prima Sparkling Spring, Gold Glitter Paper, Neenah White
Dies: Spellbinders Labels 18, Petite Ovals Large, Scalloped ovals Large, Whimsy Dress Form Die.
Thanks so much for stopping by my blog today. The next stop on the hop is the super talented Zoe's blog. Be sure to pop over and see what she has for you today. And then remember to leave comments and enter for your chance to win the prizes on offer along the hop too!
Finally, here is a complete blog hop list in hopping order:
Thank you so much for hopping with us today and we hope you enjoy all of the DT creations!
Thanks for stopping by and for your comments!!
Have a great day!!
blessings,
Thanks for stopping by and for your comments!!
Have a great day!!
blessings,
Subscribe to:
Posts (Atom)
Popular Posts
-
 This Blog Candy is now Closed. The winner will be announced sometime on Monday, November 2. Thanks for all who left comments!!! Woo hoo! ...
 -
 Hello Friends!! I hope you all had a great weekend!! Here it is November already! Time is flying and the holidays are upon us. It is ti...
 -
 Candy is now closed....Edited to include: Anywho...today is the day I said I would announce the birthday blog candy winner!! Thanks to...
 -
 Hello friends!! Welcome to the Our Daily Bread Designs October Release Blog Hop!! If you got here from Sandee 's Blog , you are in...
 -
 Hello my friends! Welcome to the Our Daily Bread designs April Release Blog Hop! If you got here from Grace's incredible blog , yo...
 -
 Happy Tuesday Friends!! I hope you are having a great beginning to your day!! Today I am popping in to share a card using a sketch for ...
 -
 Hello Friends!! I hope this post finds you all well!! Today Our Daily Bread Designs has a fun Christmas release!! The best part is that t...
 -
 Happy Monday Everyone!! I hope everyone had a great weekend!! It was so nice to see some sun after having a few weekends of major rain. T...
My dt alumni friends
-
Papertrey Ink June Release Countdown Day 2!17 hours ago
-
-
-
Elizabeth Craft Designs-Blossom3 days ago
-
Babcock State Park, West Virginia4 days ago
-
-
Bee-lieve6 years ago
-
Natural Beauties ~ Power Poppy7 years ago
-
-
-
-
Attention Hoarders. . .10 years ago
-
ODBD For the Love of Winged Things14 years ago

