Please pray for my dear friend, Grace!!


Blogroll

Splitcoast Dirty Dozen

Splitcoast stampers Alumni

Design Teams
ODBD Bread Basket

ODBD Design Team
-
Cup of Cheer – Double Take2 weeks ago
-
-


My past dt sisters at ODBD
-
Good News17 hours ago
-
Coloring fun1 month ago
-
Wonderful Christmas Ornaments1 year ago
-
-
-
Hugs and Prayers7 years ago
-
ODBDSLC268 Anything Goes8 years ago
Monday, December 3, 2012
Hello Friends!! I hope you all have had a great weekend!! Sorry that I am posting so late today but I ran out of time writing a tutorial for my viewers. I had several requests for a tutorial on how to make the Ornament treat box I posted last week.

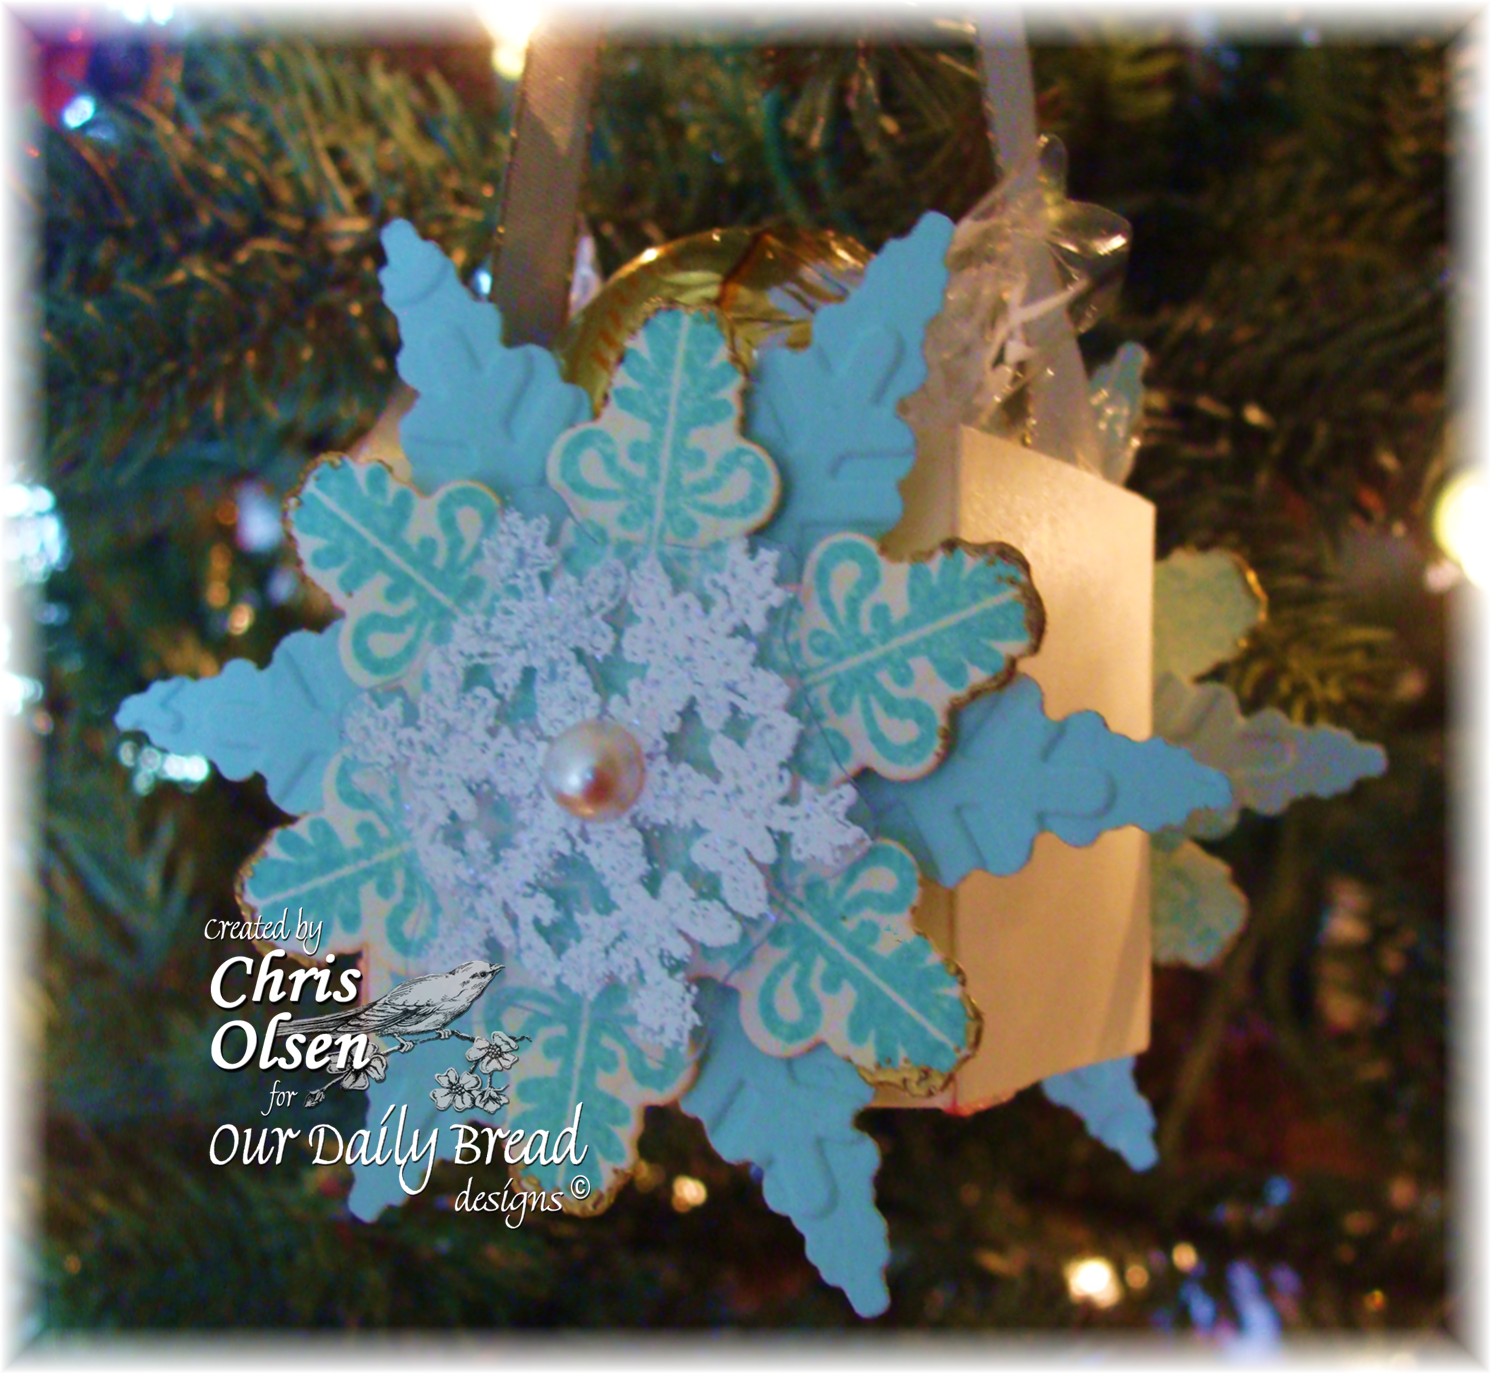
So today I wanted to share how I made it but instead of using the ODBD ornament, I used the new release Sparkling Snowflake and ODBD Snowflake Custom die. At each step, I have also left the dimension for the box I created for the ornament I already posted in italics and parenthesis). I hope you enjoy it.
For this ornament I used:
Fiskars cutter and scoring blade
1/4 inch scoretape
Vanilla Cardstock
Sky Blue cardstock (optional)
thick plastic recycled from Cuttlebug folder packaging
Cuttlebug Snowflake embossing folder from Winter Wonderland- pictured below (optional)
Baja Breeze, Sky Blue, and Versa Mark ink
Sparkling Snowflake stamp set from Our Daily Bread Designs
Our Daily Bread Designs Custom Snowflake die manufactured by Spellbinders

Step 1: Design your snowflake or ornament the way you would like. Make 2 since there is two right sides on your Snowflake Ornament treat box. (Same for the ornament treat box)
If you are using the ODBD Snowflake dies, I noticed the Cuttlebug embossing folder almost has an exact fit for the largest within the folder.


Step 2: Cut a 2 inch by 6 inch strip of vanilla paper and 2 squares that are a 1 1/2 by 1 1/2 inch (cut a 2 1/4 by 5 1/4 piece of card stock and 2 squares that are 1 3/4 by 1 3/4 for the Ornament box)


Step 3: Score a 1/4 inch line going lengthwise one each side. (same for the Ornament box)


Step 5: Cut slits from the edge on the scored lines like pictured below (same for the Ornaments treat box)

Step 6: Put 1/4 inch pieces of score tape on each corner of the box as pictured below. Repeat on both sides. Fold up sides and adhere. (same for the Ornaments treat box)


Step 8: Adhere the pre-cut Squares to the box. (same for the Ornaments treat box)
This is what it looks like when it is adhered.


Step 10: Adhere ribbon in the middle of the box starting on the bottom inside (same for the Ornaments treat box)


Here is my completed ornament:

Thanks for stopping by! I hope you are somehow inspired by my creation. .....and maybe even decide you would like to try my tutorial. It is very fun and easy to create and it is a great little something with a wow factor. Tomorrow I will share a matching card.
Have a blessed day!!
blessings,

challenges I entering my creation in:
Addicted to Stamps Challenge - Christmas TimeEclectic Ellapu - Santa Paws and/or Snow Flakes Sunny Challenges Snowflakes The Cupboard Trilogy - Frosty WinterUnique Crafters Challenge - Christmas Visible Image Monthly Challenge ChristmasMake it Monday- Anything Goes Creatalicious Challenges Winter Cupcake Craftroom Anything for ChristmasLadybug Crafts Christmas Natalie and Amy's Challenge Christmas or winter Sparkles Forum Challenges Christmas is coming Dream Valley Challenges Non-Traditional Christmas Scrapper`s Delights Paper Crafts - Non-Traditional Christmas The Ribbon Girls Christmas Projects The Squirrel & the Fox Summer or Winter 2 Sisters - #120 Christmas Sparkle (the snowflake on the front is embossed with sparkly holographic glitter) Challenge Up Your Life - 1st Snow Hiding in my Craft Room Blue & White Little Claire's Christmas Sweet Stampin Snowflakes and Ribbons
Subscribe to:
Post Comments (Atom)
Popular Posts
-
 Candy is now closed....Edited to include: Anywho...today is the day I said I would announce the birthday blog candy winner!! Thanks to...
 -
 This Blog Candy is now Closed. The winner will be announced sometime on Monday, November 2. Thanks for all who left comments!!! Woo hoo! ...
 -
 Hello my friends! Welcome to the Our Daily Bread designs April Release Blog Hop! If you got here from Grace's incredible blog , yo...
 -
 Hello friends!! Welcome to the Our Daily Bread Designs October Release Blog Hop!! If you got here from Sandee 's Blog , you are in...
 -
 Happy Tuesday Friends!! I hope you are having a great beginning to your day!! Today I am popping in to share a card using a sketch for ...
 -
 Hello Friends!! I hope this post finds you all well!! Today Our Daily Bread Designs has a fun Christmas release!! The best part is that t...
 -
 Hello, Friends!! Today the breadbasket will be sharing cards or projects they created with the new stamp and die sets just released at th...
 -
 Hi All!! I wanted to share a project I remade recently for a tutorial in the Holiday Blitz Gallery on Splitcoast. I was honored to be aske...
My dt alumni friends
-
-
Good News17 hours ago
-
-
-
sending joy...5 days ago
-
Bee Happy One Sheet Wonder 6x68 months ago
-
-
September Release!4 years ago
-
-
-
ODBDSLC275, MMTPT13 - Picnic By the Sea8 years ago
-
Attention Hoarders. . .9 years ago
-
ODBD For the Love of Winged Things12 years ago


24 comments:
Very cute and educational. Really like the snowflake box.
WOW this is absolutely gorgeous Chris!! I love the colors and layers of that beautiful snowflake! Awesome tutorial!
Hugs, Tammy
What a cute ornament box! Thanks for sharing the dimensions with us. Can't wait to see your matching card! Beautiful snowflake, dear friend - hugs...
This came out beautifully Chris! Love the snowflake box and great tutorial that should make it very easy for anyone to duplicate this for their gift giving! Love that the embossing folder fits the large die so perfectly!
hugs,
Grace
This is gorgeous Chris. Thanks so much for all the deets. Nicola x
Oh this is just so beautiful! xx
Really gorgeous design Chris!! Thanks so much for sharing your details!! HUGS :)
Gorgeous & very yummy creation!
Thank you for sharing with us at Natalie & Amy's & Sparkles this month, good luck!
Hugs Shell xx
Amazing Chris! I just love the beautiful snowflake/ornament/treat box... the lovely soft colors, rich details are over the top yummy! Hugs and blessings as always... praying for ya!
Lori
Fabulous ornament Chris..Loz
Visiting from MIM..
This is gorgeous!! Thanks for playing along at Hiding in My Craft Room!
Your ornament treat box is gorgeous. What a fantastic way to decorate for the holidays. Love the snowflake shape and colour. Thanks for sharing your wonderful tutorial with us at Creatalicious Challenges.
Hugs, Dawn
Fabulous ornament Chris, love the treat box too, fabulous tutorial.
Thanks for sharing with us at Make it Monday..
Luv CHRISSYxx
A gorgeous creation and what a good idea!! I love it!! Thanks for joining us at ATSC, hugs, Marlies
This is stunning, so beautiful.
Thank you for joining us at Eclectic Ellapu Challenge Blog, good luck and hope to see you again soon.
Hugs
Suzie xx
Gorgeous project! Thanks for joining us at Sweet Stampin' & Little Claire's : Helen x
I saw your beautiful creation on Make It Monday and had to visit and take a closer look. Gorgeous! TFS!
My entries are: #9, #12, #30, # 87, # 126, #127, #128, #157, #172, #173 and #176.
I would love to have you visit my blogs: Paper and Scraps Creations by Julia and Me and Myself on the Dark…
Hugs,
Julia
Gorgeous Christmas creation and fab tutorial! Thank you for joining us at Dream Valley :-) Love 'n' hugs, Mel xx
This is an adorable little project, it looks great on your tree & thank you for the tutorial.
Thank you for joining us over at The Cupboard Trilogy challenges & good luck
Jane xx
[owner/DT]
What a Treat Bag. Thanks for joining us with our challenge over at The Cupboard Trilogy Challenge Blog
Stella xx
TCT DT
WOW!! This is stunning Chris. I love the design and gorgeous colours.
Your tutorial is wonderful, so clear and easy to follow
Thank you for taking part in the Ladybug Crafts Challenge this month and Happy Christmas!!
Sue
Absolutely gorgeous.
Thanks for joining us at Little Claire.
Helen x
One word Gorgeous, Thank you for joining in The Cupboard Trilogy challenge
Joan DT xx
Lovely! I adore the blue :) Thanks for entering at Unique Crafters!